Since I'm swatching fountain pen inks constantly, I needed to find reusable swatching tools that could be cleaned easily at my desk with a small amount of water and a drying cloth. I've been using other tools for a while, trying out a variety of swatching and dip-pen tools.
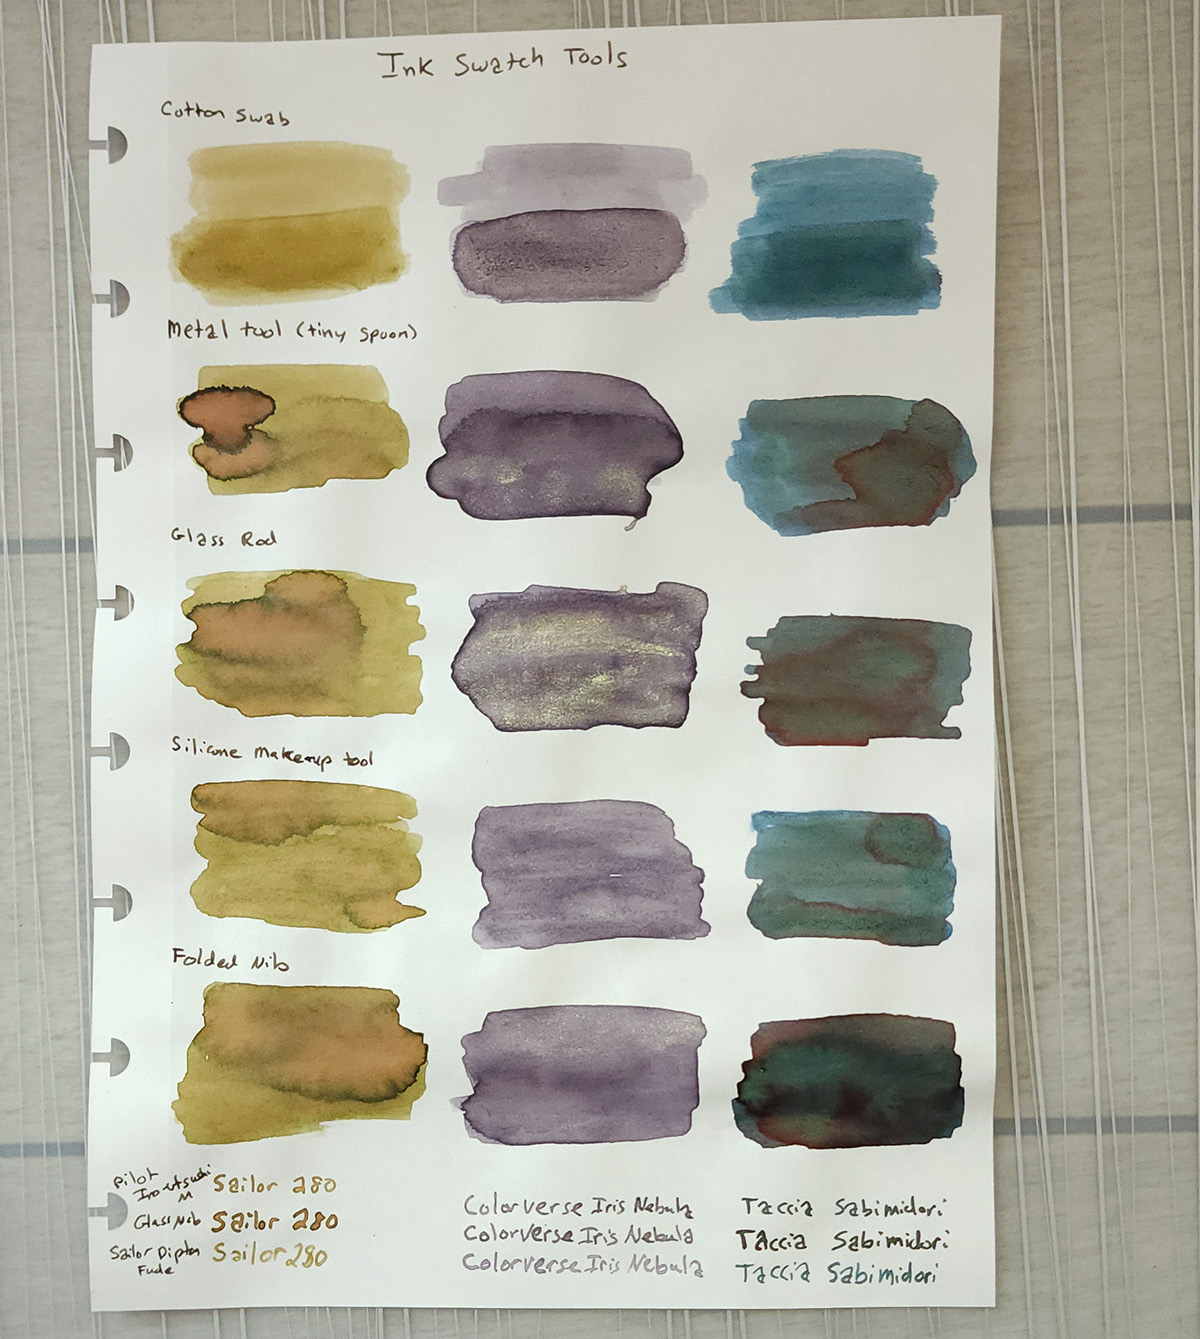
For this post I've compared 5 different tools swatching the same three inks on Sanzen Tomoe River 52gsm paper. I used Sailor 280 as a chromashading ink, Colorverse Iris Nebula as a shimmer ink, and Taccia Sabimidori as a moderate sheen ink. Cotton swabs aren't reusable but I'm including them in the comparison because they are readily available and often used for swatching.
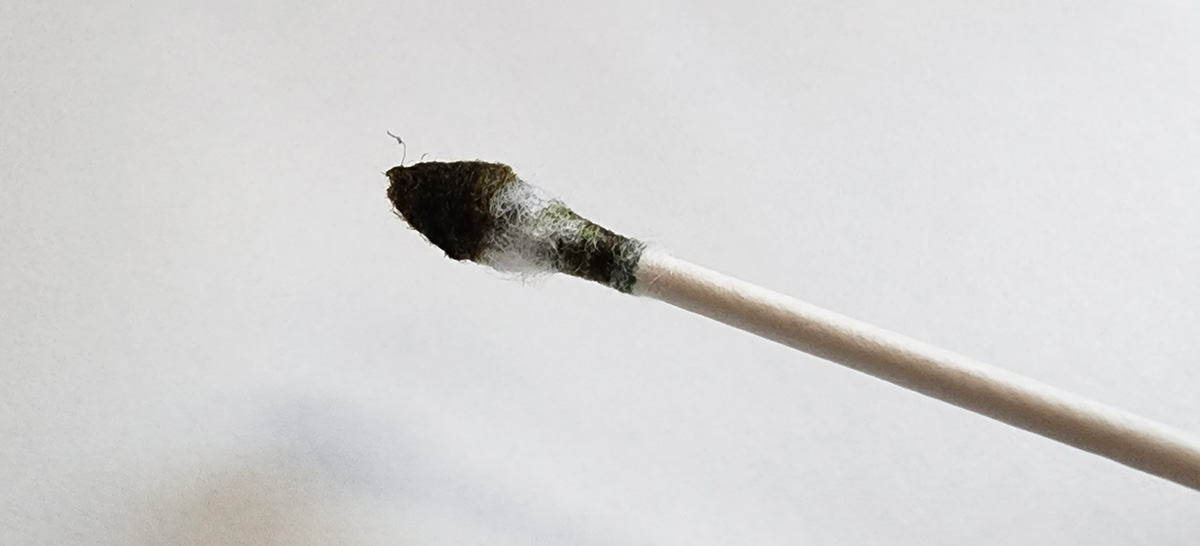
Tool #1 Cotton Swab
Most people will already have access to cotton swabs at home, or can get them easily, so these are often the first swatching tool someone will try.
Pros:
- Readily available
- Can produce a consistent and even swatch
- No clean time since you need a new end for each ink
Cons:
- Single use, produces a lot of trash
- Need to saturate the swab to get enough ink on the page
- Shimmer and sheen may not be well represented
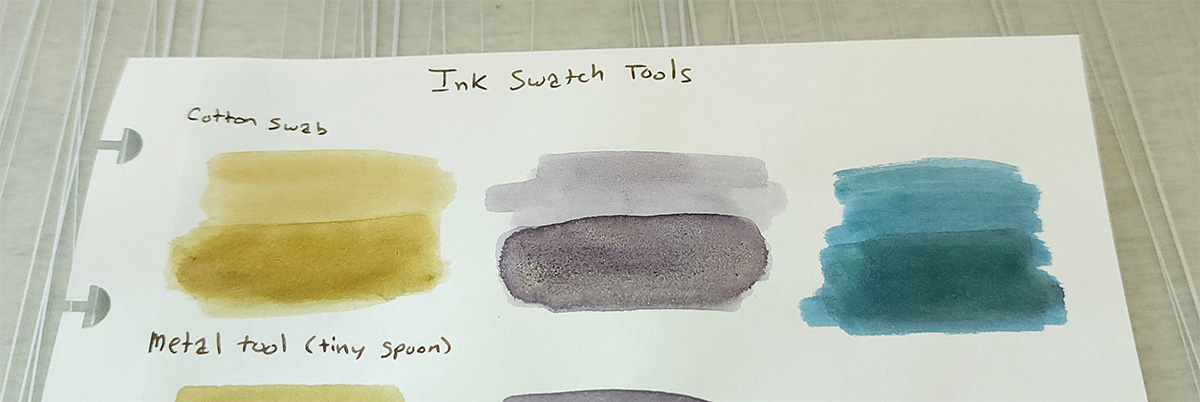
My initial swatches produced a thin, light layer of ink. It was very even, different from the range when the ink pools a bit. I dipped a second time with more ink to add another layer to the lower part of the swatch to get a little closer to the full color you would see in a typical pen. A more generous dip from the start likely would have looked closer to the rest of the swatches, but I was reluctant to fully saturate the swab because it felt like a waste of ink. Shimmer was present but subtle, not concentrated anywhere to be easy to see, and only a bare hint of sheen.
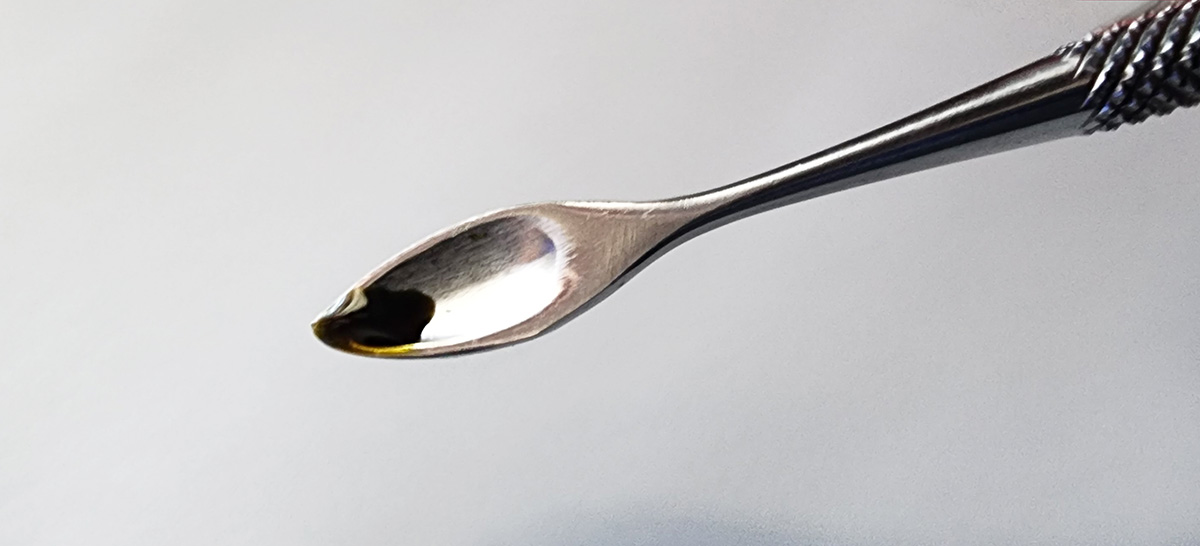
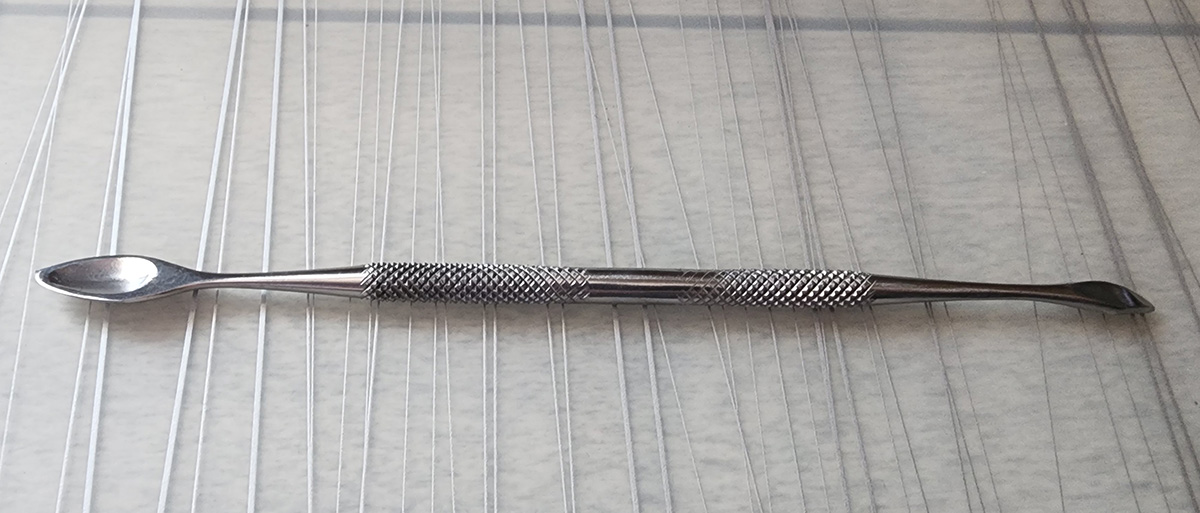
Tool #2 Small Metal Spoon
I rarely used cotton swabs, but after some time of using glass dip pens or paint brushes for swatching I went looking for something that would be more consistent, wouldn't scratch the page, and/or would be easier to clean. I'd seen others use metal tools like a bent letter opener or a folded nib and decided to go dig around in the tool closet to see what I could find to test. I came across this small metal tool in what I think was meant to be a wax carving toolkit. It has a small spoon shape on one end and a smaller curve shape on the other end that would fit in even the smallest of ink containers (ahem, Ferris Wheel Press chargers) when needed.
Pros:
- Ink sticks to the front and back well enough, and a small amount can collect in the bowl of the spoon
- The back is a smooth curve that can spread ink without scratching
- The smaller tip end fits in the smallest bottle openings when needed
- Rinses clean very easily
Cons:
- One edge of the spoon is thin and can scratch paper
- Ink in the bowl of the spoon may be too far from the edge to easily coax onto the page
- Similar tools can be a little hard to find, or only in a large kit that's more expensive
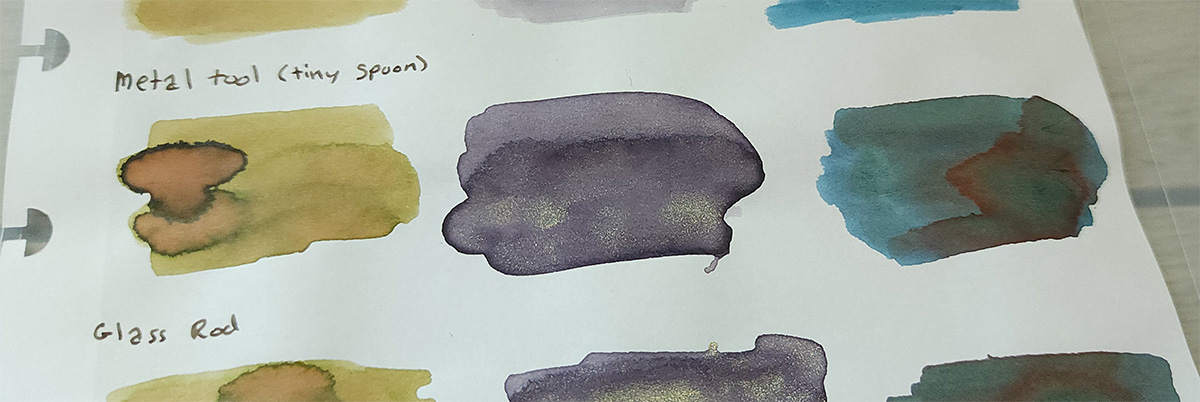
With a little practice this tool can be used to create a thinner layer of ink in one spot and more pooling elsewhere to show off a range of ink properties. Both shimmer and sheen can be clearly seen.
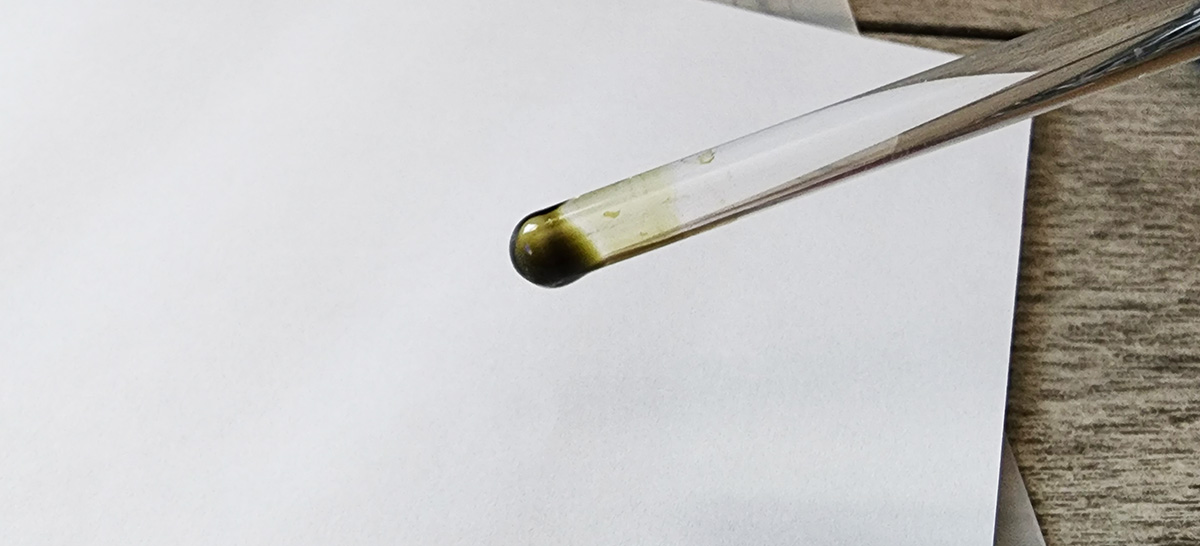
Tool #3 Glass Stir Rod
I was surprised by a pair of long glass stir rods (surely intended for some important laboratory use) included as a free extra with something else I'd ordered. Naturally I asked "Will it swatch?," tried one out and sent the other to a friend.
Pros:
- Ink sticks surprisingly well
- The rounded ends are gentle on paper (if you don't press hard), can control the spread of ink fairly well
- Fits in any bottle opening
- Rinses clean easily
- Can gently stir shimmer inks without recapping and shaking the bottle
Cons:
- A bit long and fragile to take on-the-go
- The amount of ink from a dip can vary, so some inks may need to be re-dipped and others might end up with too much on the page
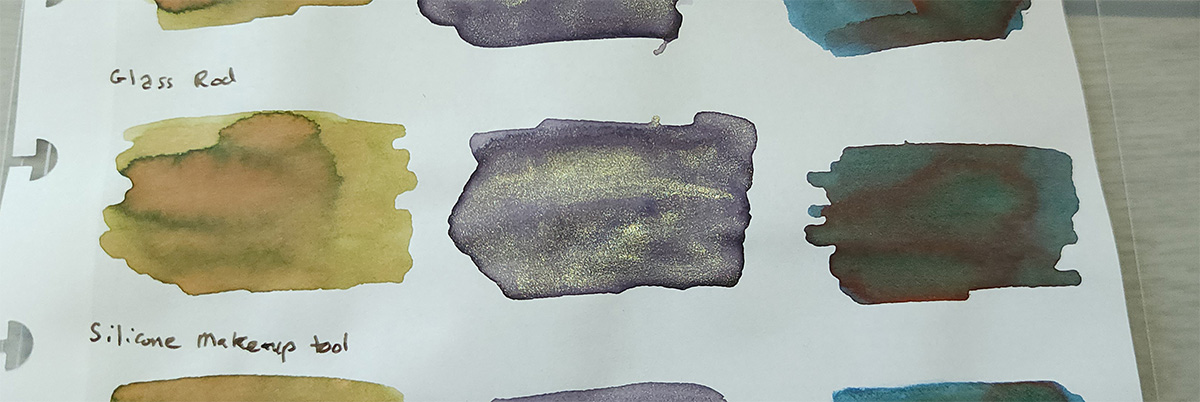
With this tool I could quickly make swatches with a range from thin to pooling ink, though on one I ended up laying down more ink than intended so a little practice would produce more consistent results. Shimmer and sheen were visible as expected.
Tool #4 Silicone Make-Up Tool
I first saw this tool used for swatching on an Ink Witches Twitch Stream and wanted to try it for myself, especially since it might be a bit easier to find and recommend as an alternative to cotton swabs.

Pros:
- Inks stuck to the surface
- Silicone tip was gentle on paper
- Easy to control and spread the ink
Cons:
- The silicone surface is small, may need to re-dip
- May not fit in small bottle openings
- Need to pay close attention to keep ink or water from going under the metal holder to avoid a mess or affecting the next swatch
- The convex surface provides no assistance with less "clingy" inks

This worked pretty well, but compared to the tools that were all one material it took more care when dipping or cleaning to try to contain the ink and water to just the silicone tip and not get any stuck up in the metal holder where it might leak and mess up a subsequent swatch. It's worth a try though, especially if it's easier to find and there isn't a desire to make a ton of swatches quickly.
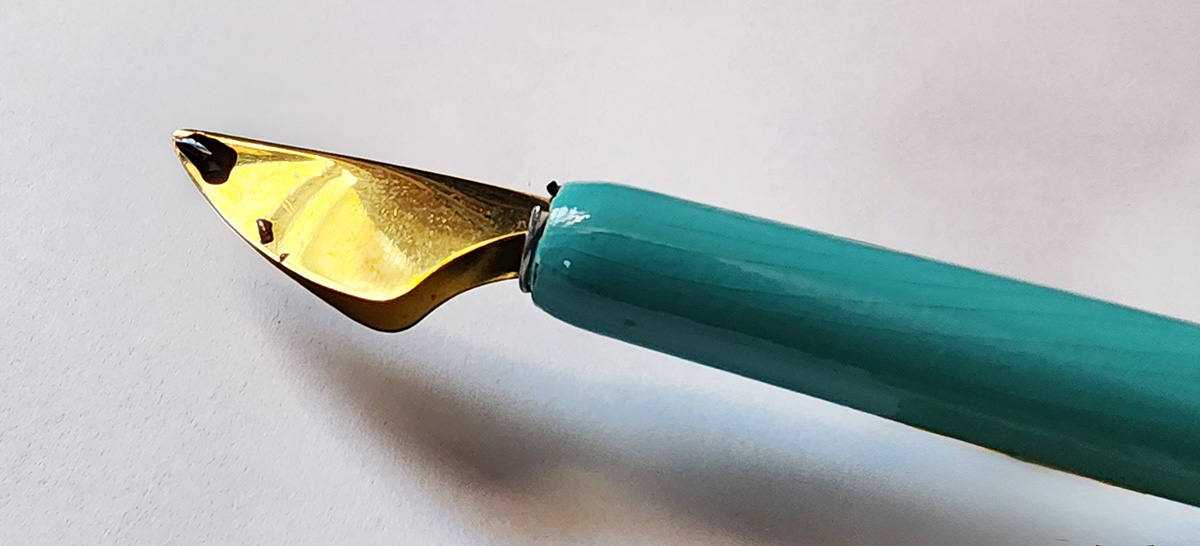
Tool #5 Folded Nib
This is a fun tool, and searching the internet for where to buy one is how I found out there's a calligraphy shop in my city (that also carries some fountain pens and ink). The nib is used in a dip nib holder, and there are two "wings" of metal are folded together to create a curved edge with a narrow ink channel between. The curved edge can be tilted against the paper to vary the horizontal line width, while the vertical line is relatively thin. Reverse position writing with just the point produces a thinner line in all directions.
Pros:
- Quickly makes a large, even swatch
- The reverse can be used to write the ink name (at a fairly broad line width)
- Holds a generous amount of ink each dip
Cons:
- Too large to fit in some bottle openings or sample containers
- Not quick or easy to thoroughly rinse and dry the nib after each use, requires more water than other tools
- Can be difficult to vary the amount of ink to show variation in the swatch
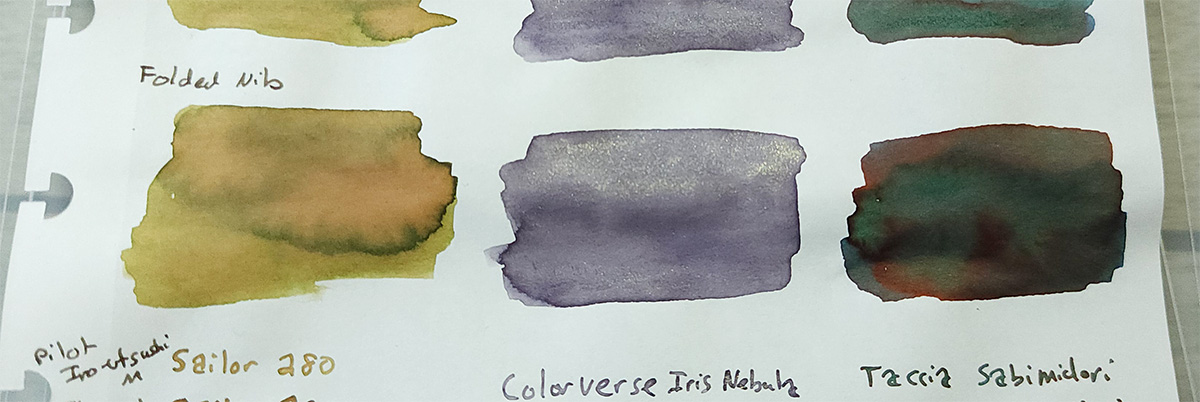
I like using this nib for big, dramatic writing or sketching but it's not my favorite for swatching. It can hold and deposit more ink that I typically want for a swatch, and the extra time and water required to clean between swatches limits how much I can do in a swatching session.
Conclusion What's My Favorite Swatching Tool?
Everyone will have their own criteria and priorities for what they are looking for in a swatch and a swatching tool, so this ranking is only my personal preference and not an attempt to determine which tool is objectively the "best." My goal here is to describe my process for picking the tools I like, and encourage anyone who swatches ink to consider how well your tools are working currently and perhaps try some different tools (especially non-porous, reusable tools) to see what you think.
- The small metal spoon is still my favorite, in part because it's now so familiar and it does just what I need, and I can easily throw it into a pouch to take with me when needed.
- The glass stir rod is a great tool that I will keep using, but the material and size means it's going to stay at the desk for swatching.
- The silicone make-up tool produced acceptable results and I don't mind using it, but it just can't match the ease of cleaning advantage the tools in a uniform material have.
- The folded nib is very fun to use, but it was more difficult to get the amount and distribution of ink I wanted for a swatch and was much more time-consuming to clean and dry between inks.
- The cotton swab was initially too light, and the even spread did not show the range of ink properties as well. Saturating the swab more would have helped, but the wasted ink and amount of trash put this on the bottom.
Congratulations little spoon, despite trying many other things and adding a few new tools to my tool kit, you are still the favorite that I'll reach for first.
Addendum Other Tools
I've tried swatching with more than just these five tools, so here are a few brief, parting notes about other tools that either did not make the cut or were too similar to the chosen tools above.
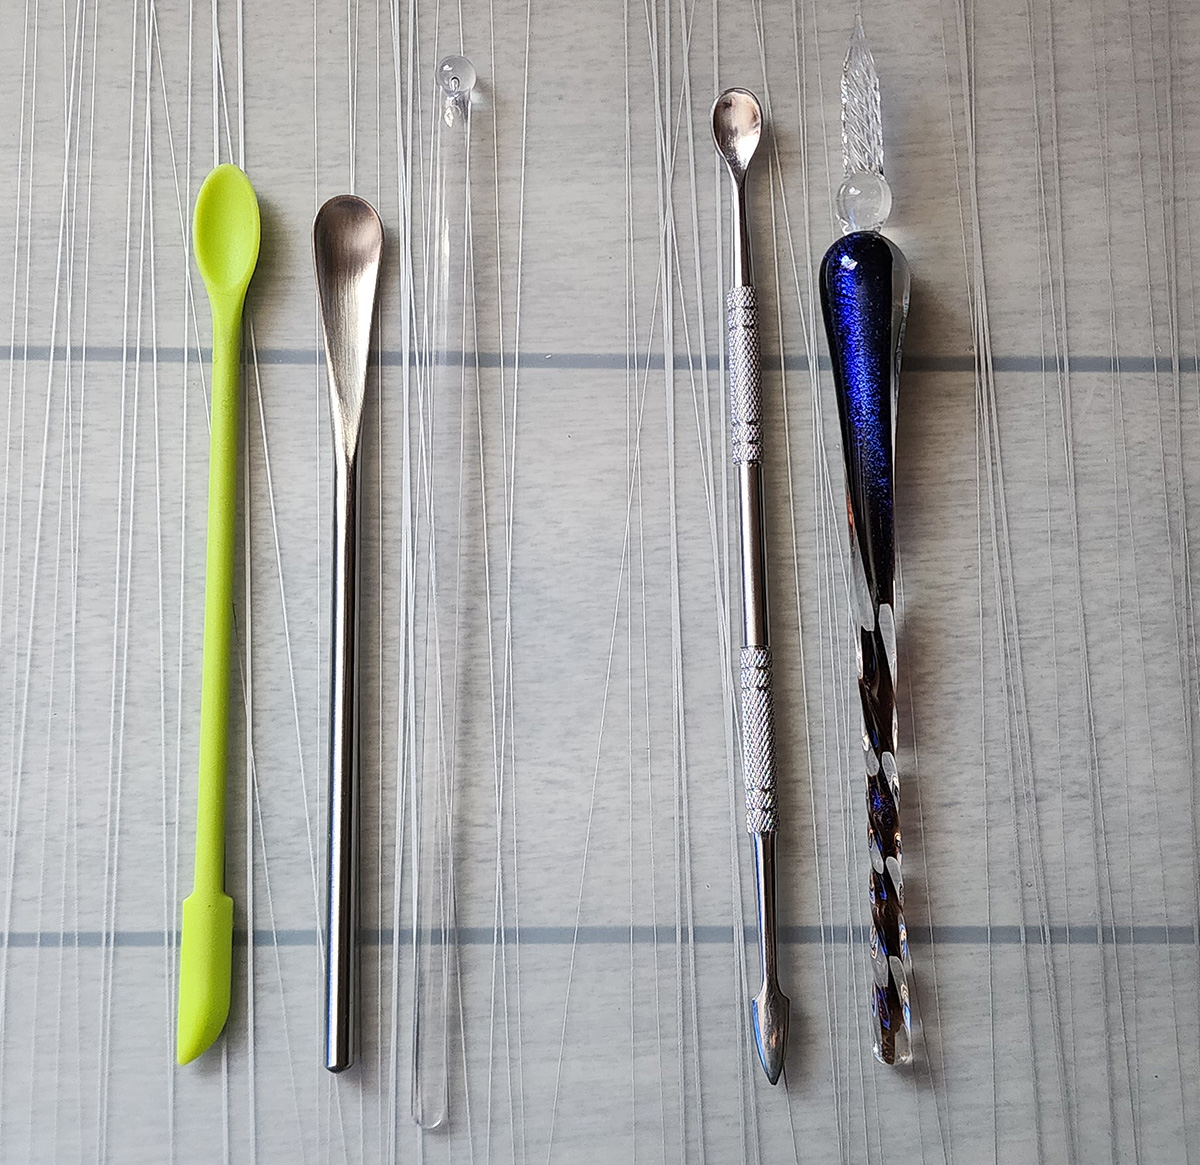
- This silicone tool with a small spoon end and a spatula end looked promising, but the ends are too flexible to control and a bit too large to fit in all bottles.
- This metal drink stir spoon works if you can fit the spoon in the bottle, but it's too large for many. The handle end is not rounded enough to use as an alternative, the sharper edge does not allow it to hold or spread ink well. I'll just be using this one for my tea.
- I had hoped these plastic drink stirrers with the round ball end would work because I could easily get a large pack to share, but the ink just won't stick to it well, and there can be rough bits left over from manufacturing that can scratch the page.
- I found this other metal spoon-shaped carving tool that was similar to my original spoon and available to purchase separately. It also works pretty well, though the other side is more pointy. I'll probably throw this in my to-go kit if I can cover (or remove) the sharp end so it doesn't poke holes in things.
- This has been my favorite glass pen. While I can angle the nib to the side to make a swatch, the ridges in the glass tended to scratch some paper including the Col-o-ring/Col-o-dex cards. However, the handle end is similar to using the glass rod for swatching so that's an option if I wanted to use a single tool for swatching and writing (or sketching). Fun fact: I use this pen for most of the sketches on the Col-o-dex cards.
September 2025 Ink Swatching Tools Update
Since I wrote this post, one of these tools I tested has become a much more significant part of my swatching toolkit. Learn more about that, choosing dip pens for swatching, and more in this follow up post: Ink Swatching Tools Update.