I wrote a post about testing different fountain pen ink swatching tools over a year ago. My main conclusion at the time was that a variety of non-porous (metal, glass, silicone, plastic, etc.) tools could produce similar swatches that I greatly preferred over cotton swab swatches, and the decision of what to use going forward came down to which tools were the easiest to obtain, use, and clean. Since then, one of the tools I tested has become a significant part of my swatching toolkit.
Another aspect I didn't cover in that first post was considering how well the dip pen or nib used to label the swatch of ink serves as a writing sample "preview" of what an ink might look like from my pens.

Since I'm frequently swatching a lot of inks, my use cases might not match the typical fountain pen ink user—we all have our own specific needs and preferences. My aim here is to share my process for choosing swatching tools and dip pens rather than specifically recommending the exact tools and swatching techniques I use. (The topic of why and how to swatch is a whole other post altogether.)
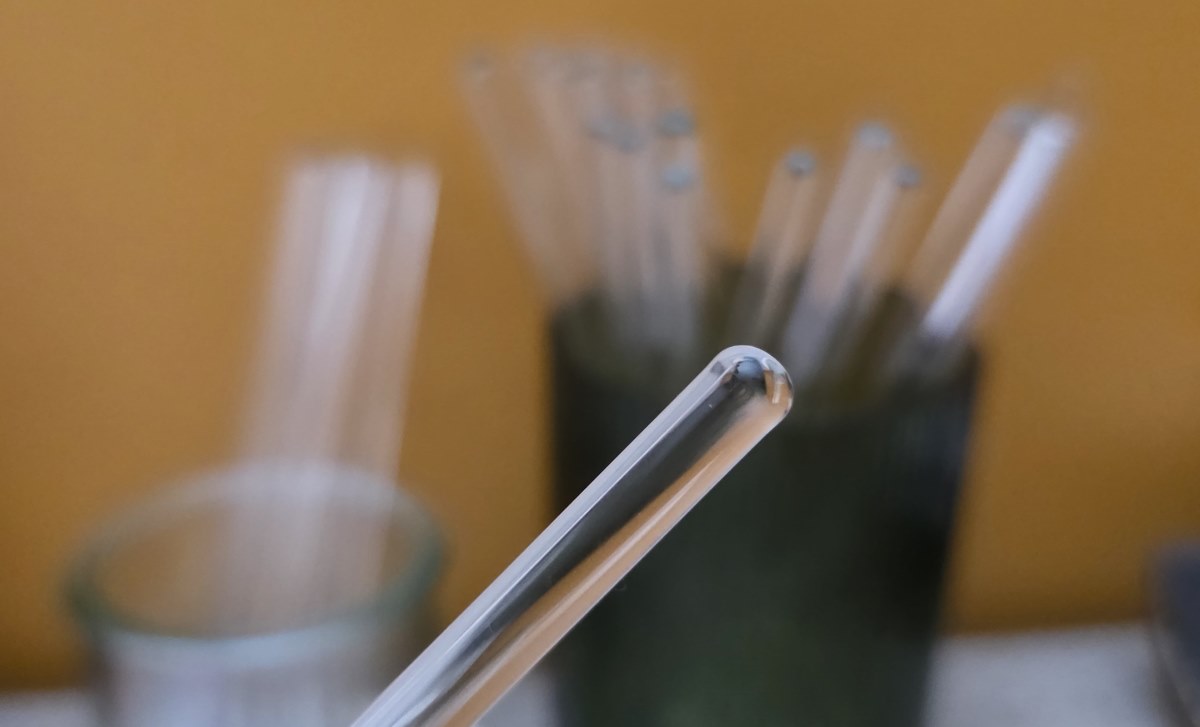
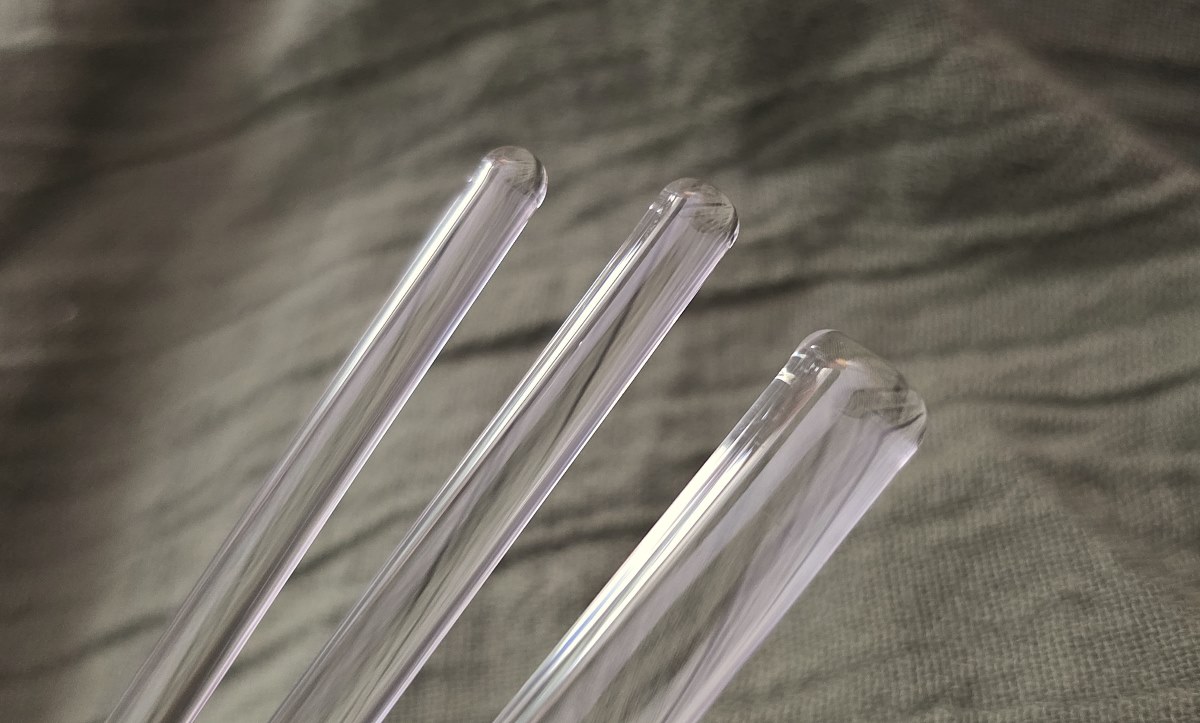
Glass Stir Rods
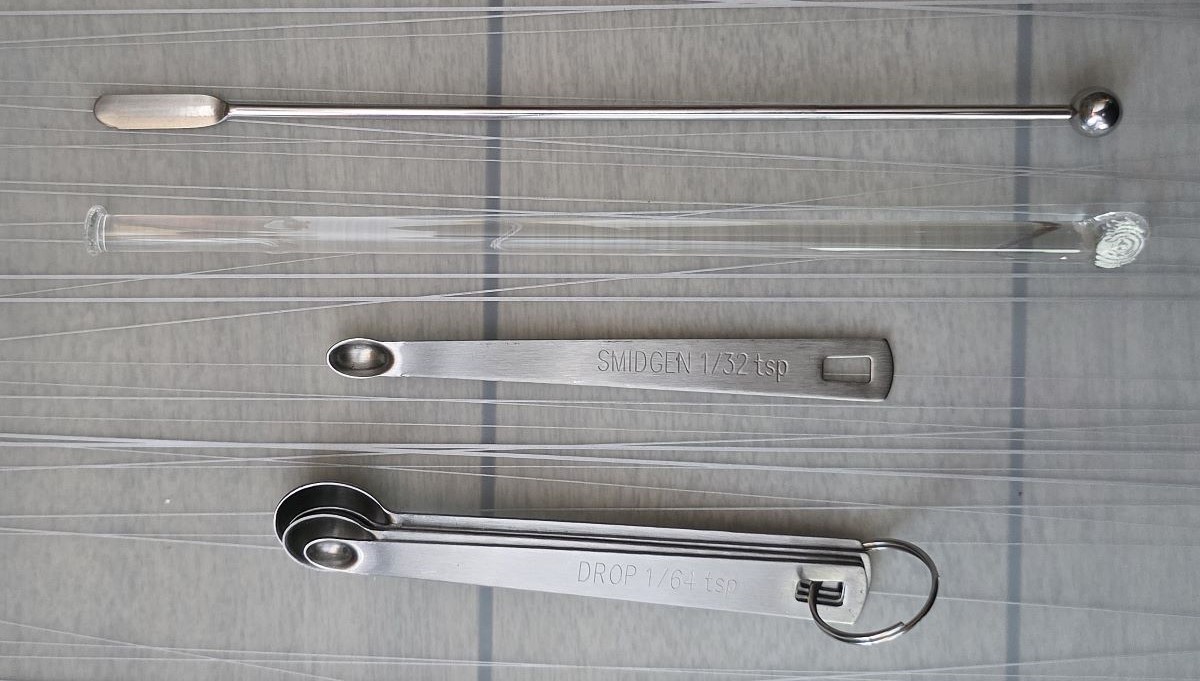
The first glass stir rods I tried were a bonus item that came with another order, and the answer to "will they swatch?" was yes, surprisingly well! Those rods were 8 inches long—a bit unwieldy, and I worried about their fragility. After finding shorter 6 inch "reusable drink stirrers" in bulk and using glass rods a lot more, this has become the tool that best hits all three criteria of being relatively easy to obtain, use, and clean. It may not be an item someone already has, so on an individual basis another tool may be a better fit by being already available, but as something I can easily recommend and even hand out, nothing has beat the glass stir rod.
I use one jar or container filled with clean sticks and an empty jar to collect used sticks. This allows me to swatch a lot of inks quickly without having to clean the swatch tool between each one. A quick rinse under the tap and then spreading out the clean stir rods on a towel to dry is usually all the cleanup that's needed (pigmented inks might need more scrubbing if not rinsed right away). Despite my initial concerns, this setup has actually been pretty easy to take on the go—I've been able to demo and share these glass rods at several pen shows and meetups.
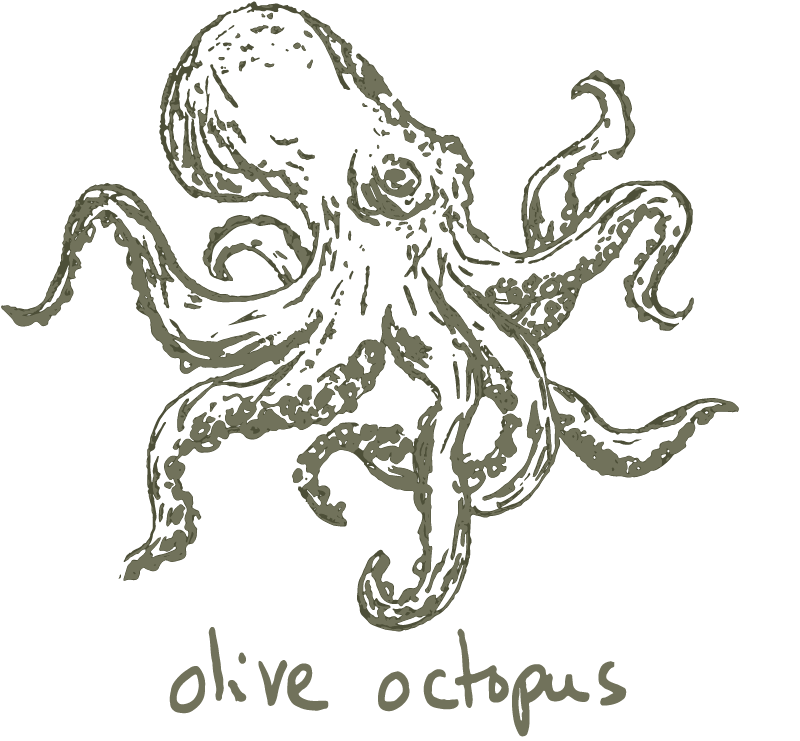
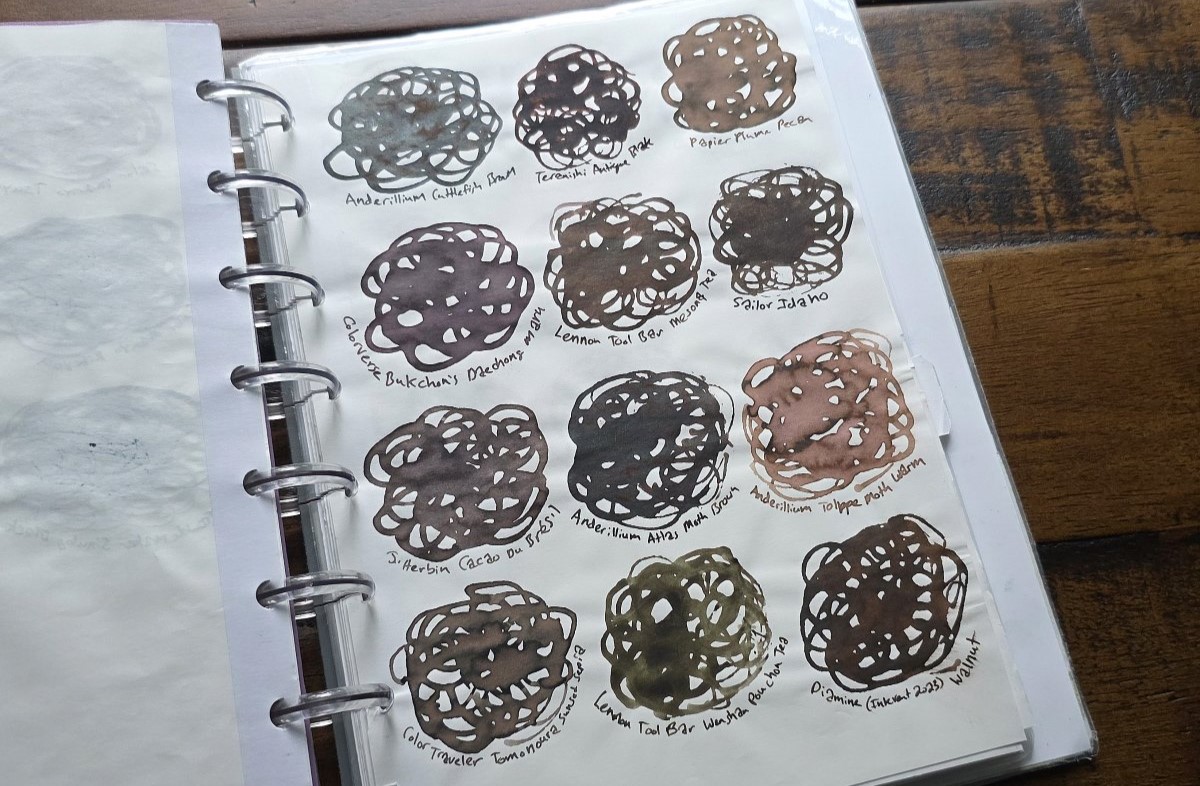
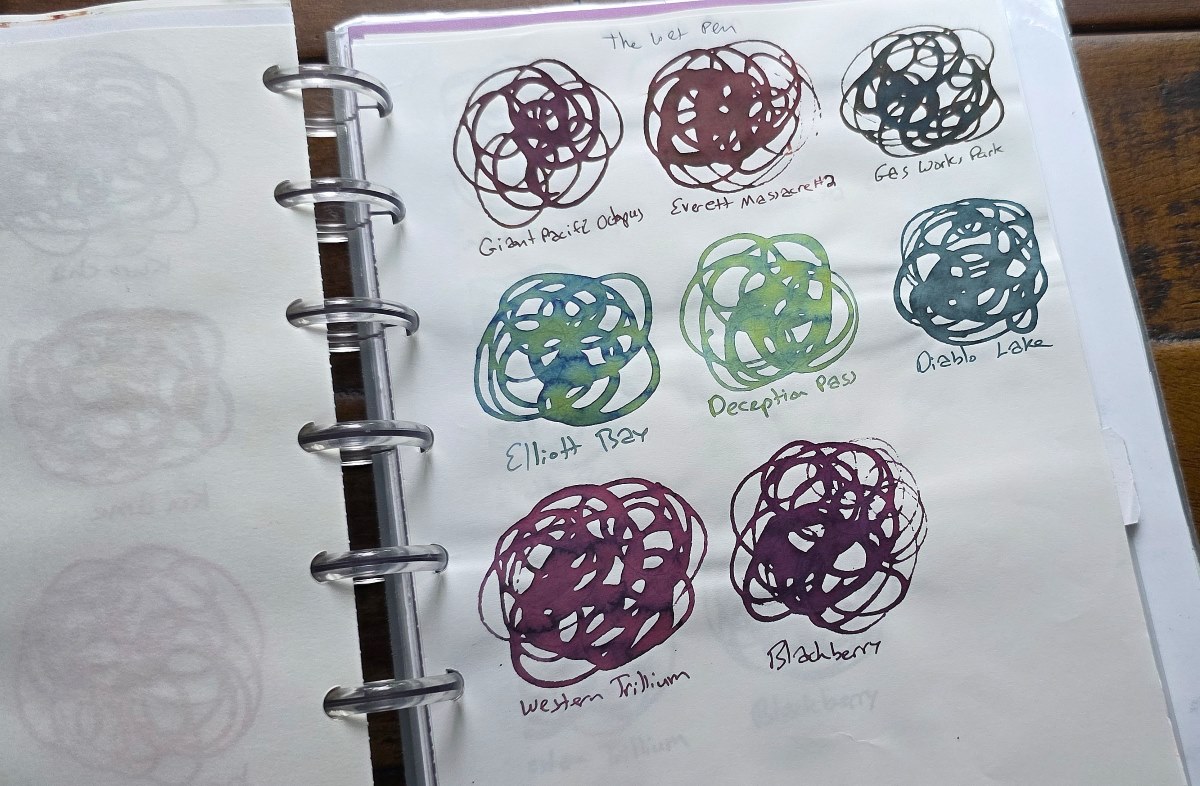
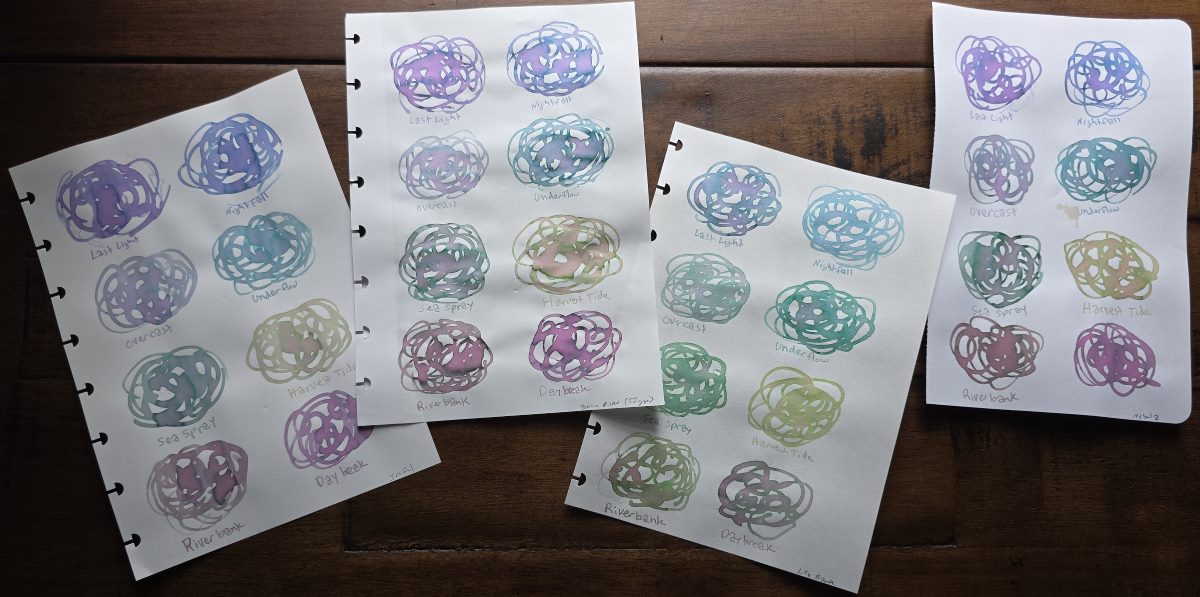
I love the range and character I can see in an ink by making an inky tangle of lines when swatching. I played around with different shapes but like these swirls best—creating a good balance of thin and pooling lines with lots of edges to show a range of character in the ink.
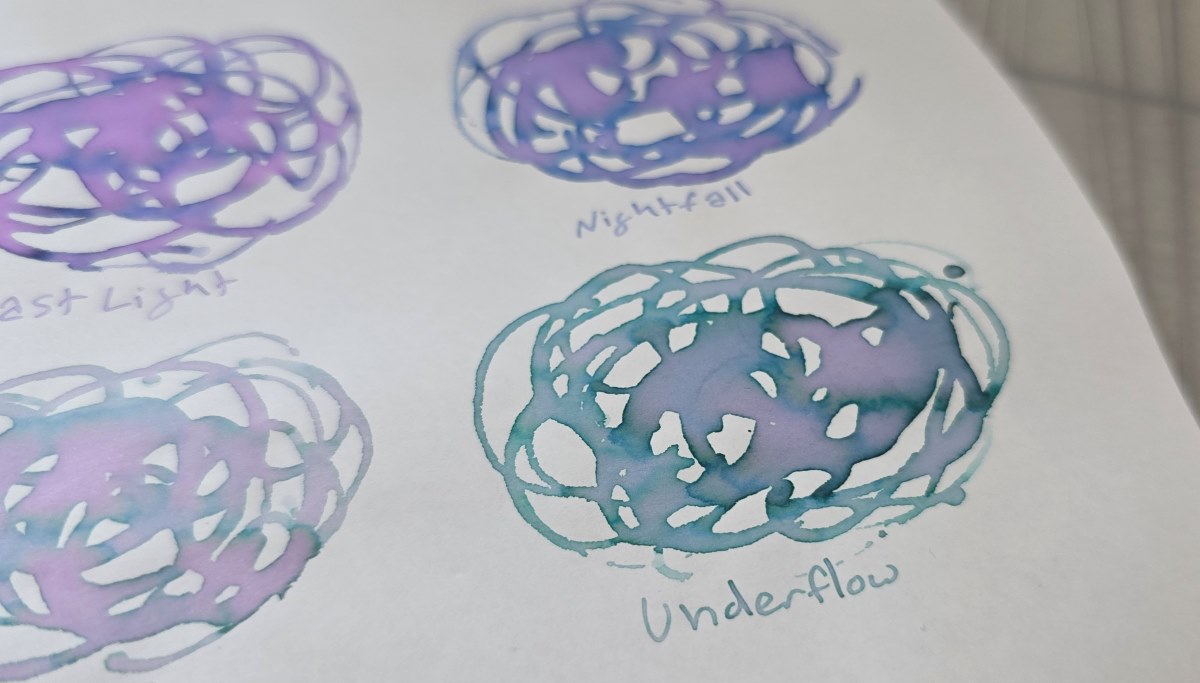
I prefer this swatch style to the more solid swatches of ink I had been doing, and they are still pretty quick and easy to do.
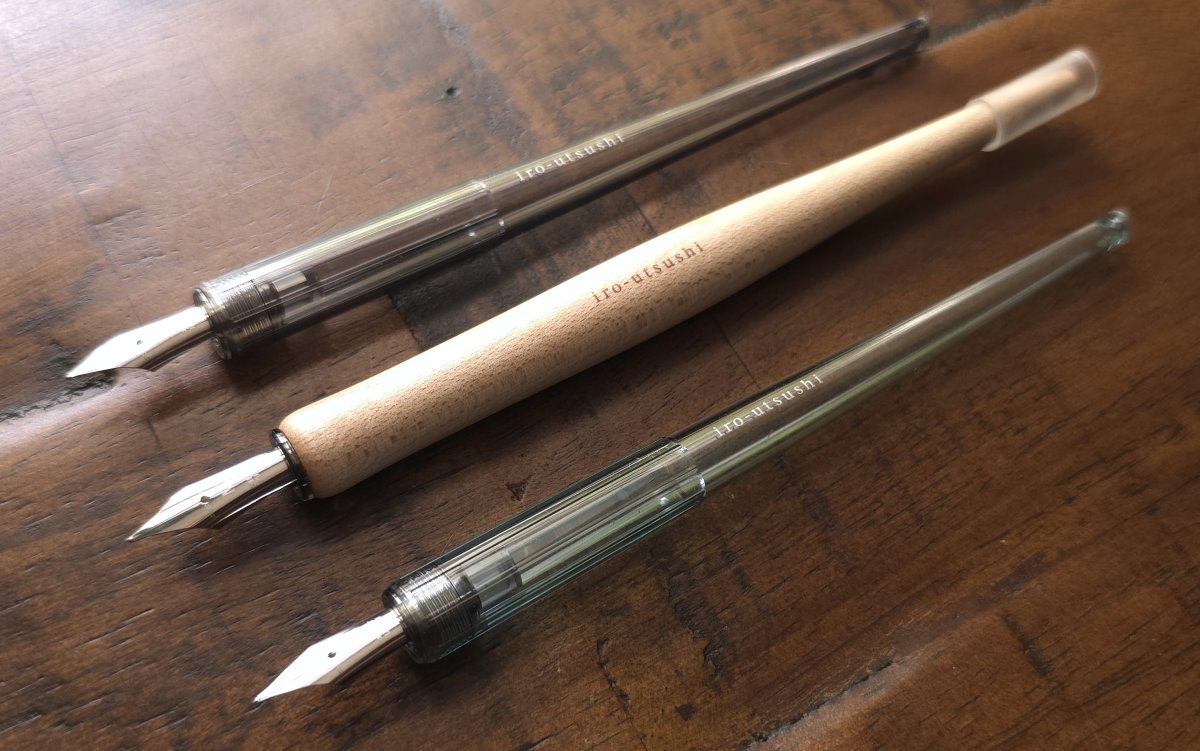
Pilot Iro-Utsushi Dip Pen
By far my preferred dip nib for doing a writing sample is the Pilot Iro-Utsushi dip pen with a medium nib. The fine nib is good too, but I tend to write with wider lines so the medium is a better match for me. These are available with either a plastic or wood handle. The plastic is very light and easy to throw into a swatching kit, and will fit into most bottles or sample vials without issue. The wood handle is a nice upgrade and has a flat side to keep the pen from rolling, the wider handle can be more comfortable to hold but may not fit into smaller bottles or vials.
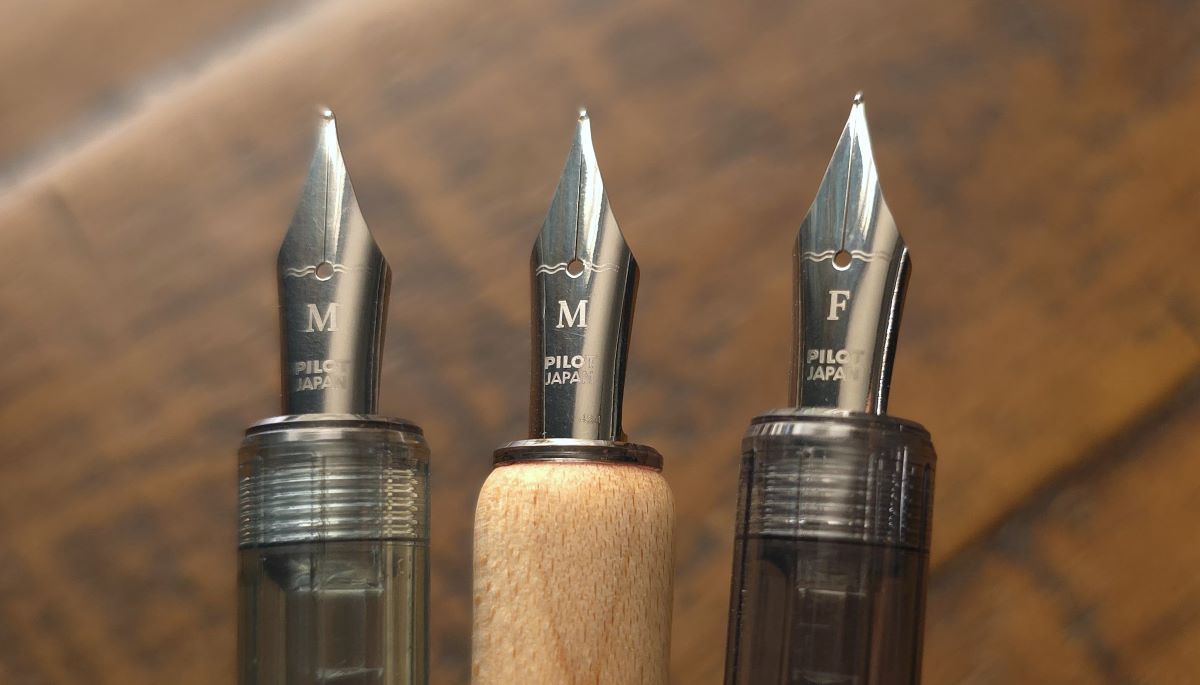
I love the way this nib feels on the page. It's very smooth and produces a consistent, slightly wet, medium line. A single dip is plenty for writing out the brand and name of the ink which is all I need most of the time.
I've picked this as my favorite, others may prefer a Kakimori dip nib or the newer Colorverse shuttle nib, the Sailor Hocoro dip pens (especially the option to add a feed to hold more ink per dip), a glass pen, etc. I usually carry examples of all these tools with me for people to try because they each have a different feel and their own strengths and weaknesses—trying a few things is a great way to find what fits your own needs and preferences.
Ink Swatch Discbound Notebook
With a glass stir rod and a Pilot Iro-Utsushi dip pen I get a pretty good representation of an ink, so I'll use these tools on multiple fountain pen friendly papers to really dig into a set of inks.
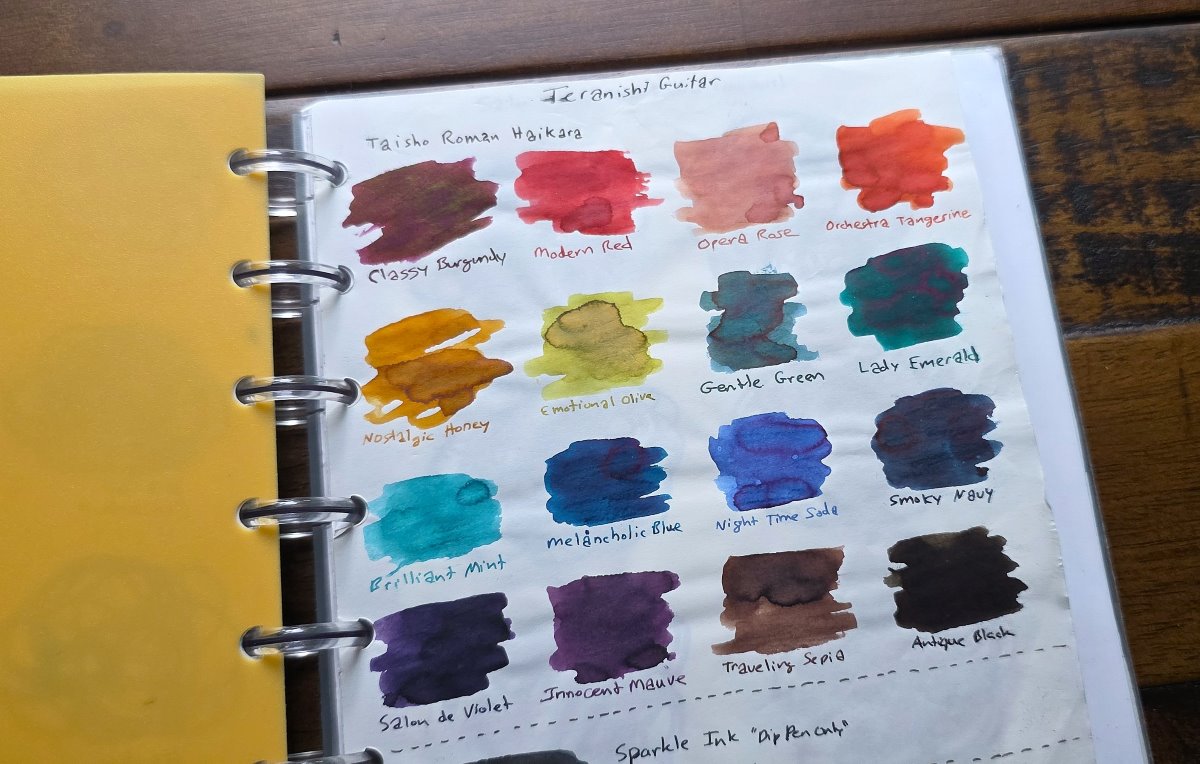
I've got a discbound punch to put all these loose swatches on different types of paper into an A5 discbound notebook as I explore different brands or series of inks, a particular color of ink, a group of inks picked up at a pen show, etc. So far this notebook only represents a fraction of my overall ink collection, but it's growing all the time.
Col-o-ring and Col-o-dex Cards
I swatch every ink I have a bottle or sample of on both a Col-o-ring and a Col-o-dex card. I established the style and tools I use for all these cards over 2 years ago, before I had glass stir sticks and the Pilot Iro-Utsushi dip pen, so I continue to use a different set of tools for those cards to maintain consistency.
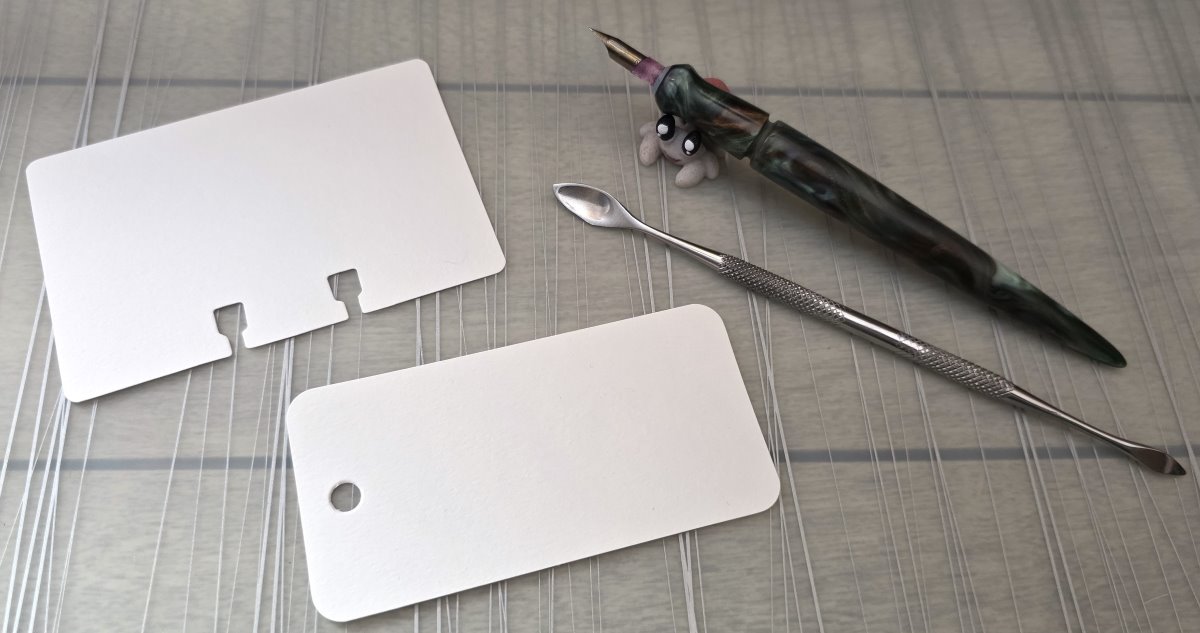
Inspired by seeing things like letter openers (artisanally bent or otherwise) used for swatching, I went looking around my house for tools to test. I found this tiny metal carving tool shaped like a small spoon in a toolbox—it's small enough to fit into most bottles and sample vials, ink sticks to the metal and collects in the spoon shape, and if I'm careful with the edges it won't scrape the cards. It works well for my needs, but as that specific tool is difficult to find I recommend either looking for a similar random tool or getting something like the glass stir rods that are easier to find.

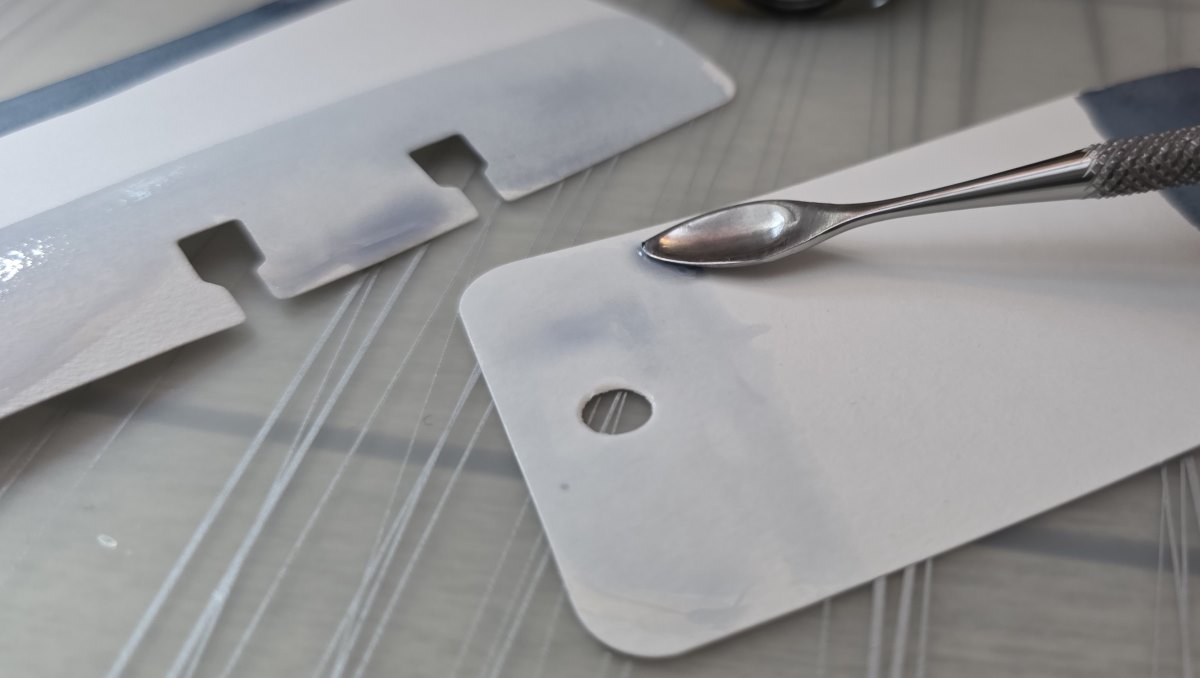
I start by spreading ink about three-quarters of the way across the top of the Col-o-dex card and along the right side of the Col-o-ring card, then drip drops of water on the cards to dilute the ink left on the metal tool and create an ink wash. On the Col-o-dex card this ink wash finishes out the top band and covers the bottom third of the card, and on the Col-o-ring card the ink wash is along the left side of the card. These diluted areas tell me more about the underlying color(s) in darker inks, the colors may separate a little bit like chromatography, and they show how an ink might look when used for painting. The ink wash on the Col-o-dex card is also an artistic choice as a background for sketches (more on that later).
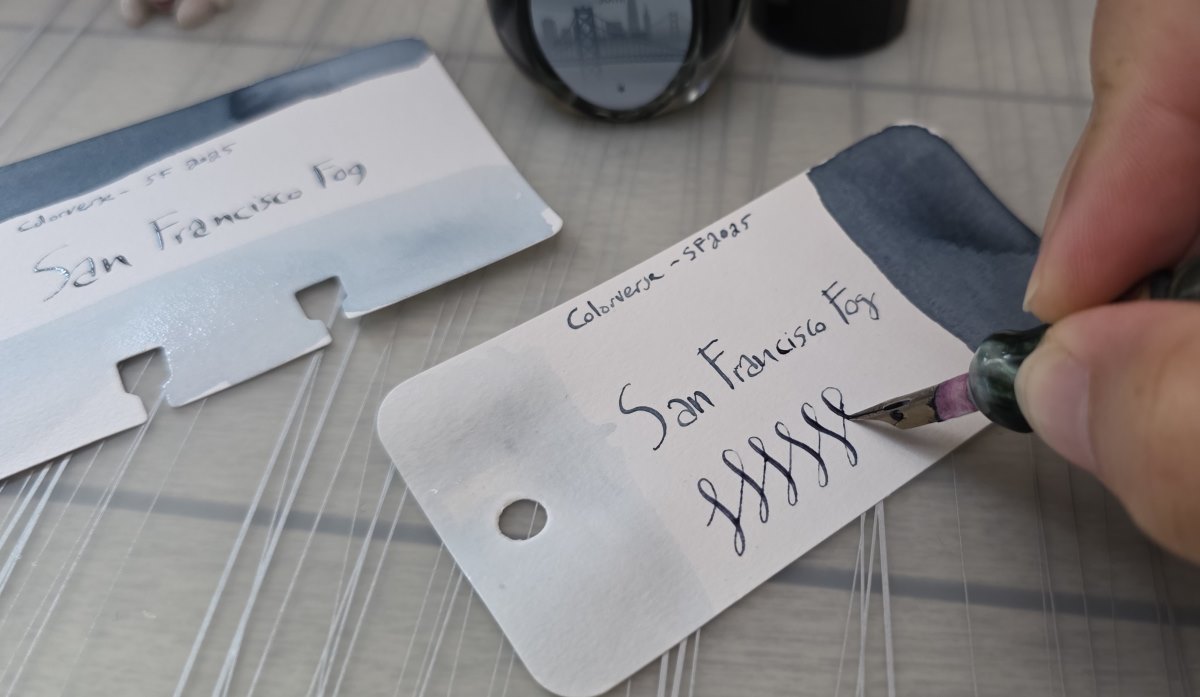
I chose to use a certain shape of slightly flexy, disposable metal "calligraphy" dip nibs for the text. While the flex of that type of nib produces some mix of thin and thick lines and varying levels of ink put down, continuing with this style of nib is a lot more about maintaining consistency (and being a little fancy) than it being the best tool for representing my typical writing with a fountain pen.
At this point I'm familiar enough with how this style of writing compares to when I actually use an ink in a pen to get enough of a first impression, but if you are establishing a style for swatching on cards like these you may prefer using a nib or dip pen that more closely aligns with your typical writing. A loose #6 Jowo nib can also fit in most dip nib holders and be used for swatching. I think one of the most fun things about swatching is figuring out your preferred balance of practical and aesthetic/artistic style.
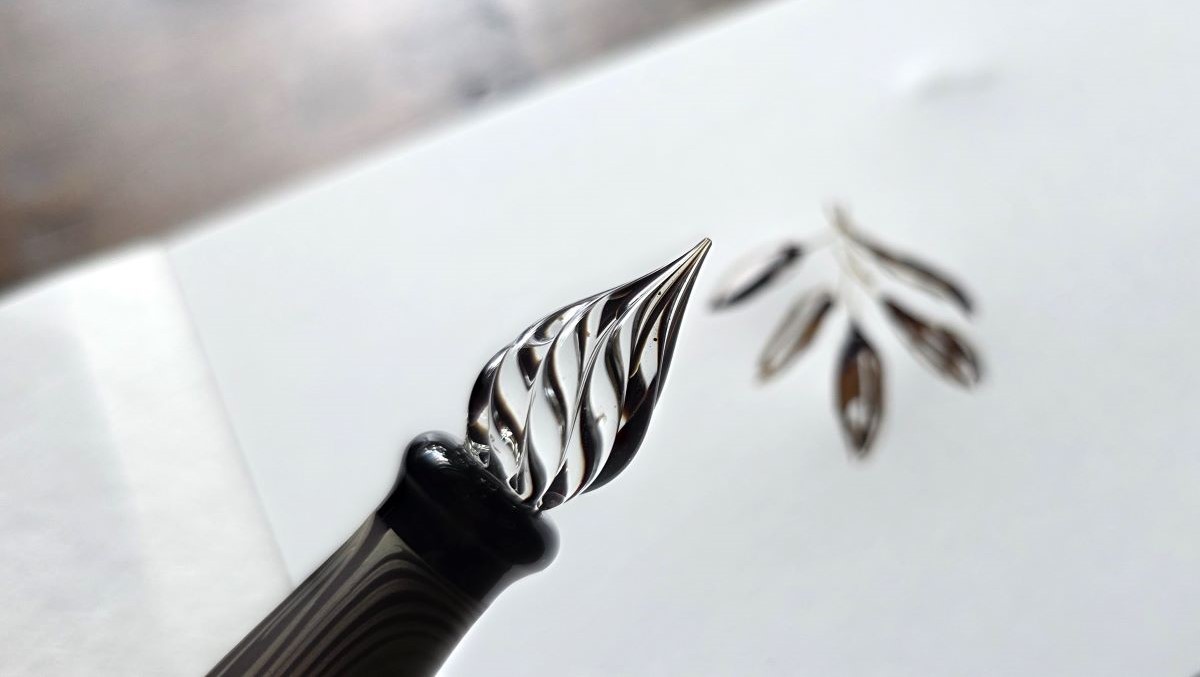
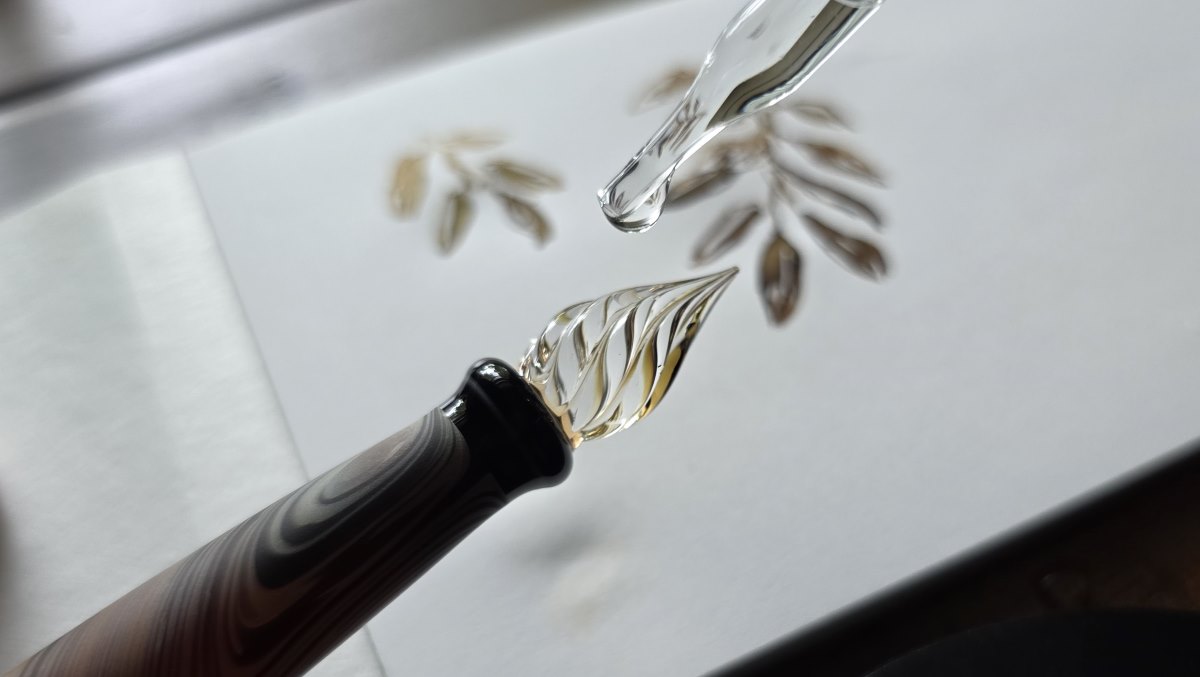
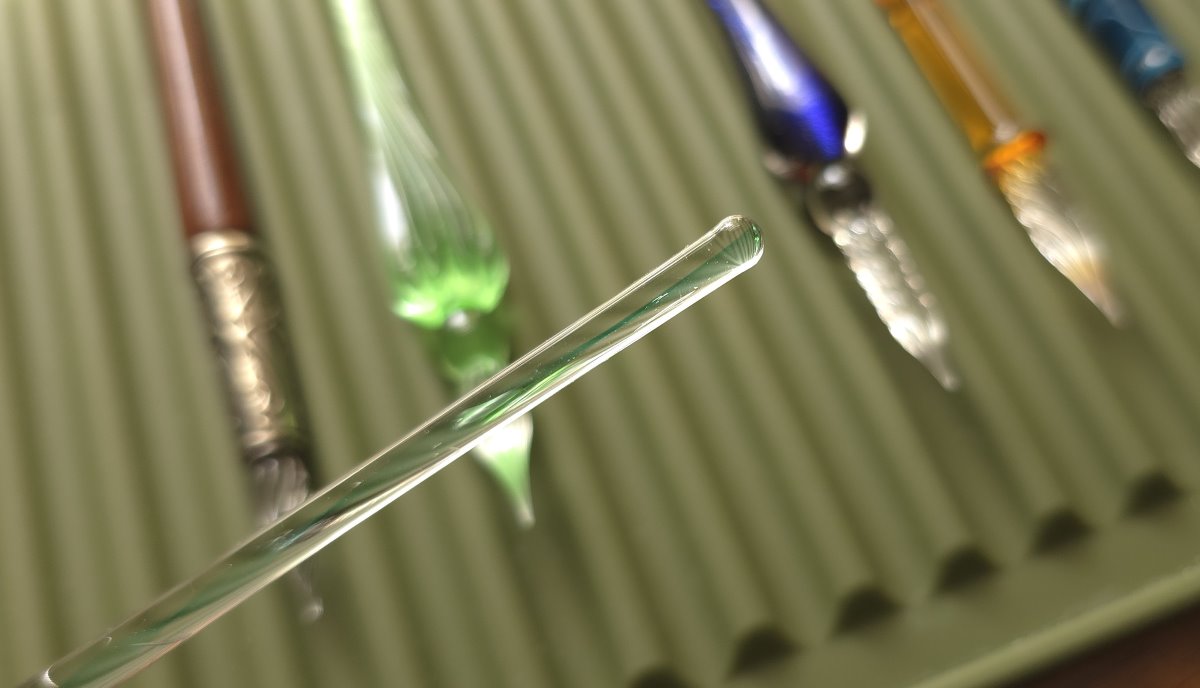
Glass Dip Pens
The final tool I use on the Col-o-dex cards is typically a glass dip pen for adding sketches related to the name, color, imagery, or inspiration behind an ink, after the ink wash along the bottom of the card has dried. My love of ink goes beyond my lifelong obsession with color—I love the glimpses into the places and things that people are inspired by when creating and naming inks, whether that's something profoundly meaningful, fun and silly, or something in between.
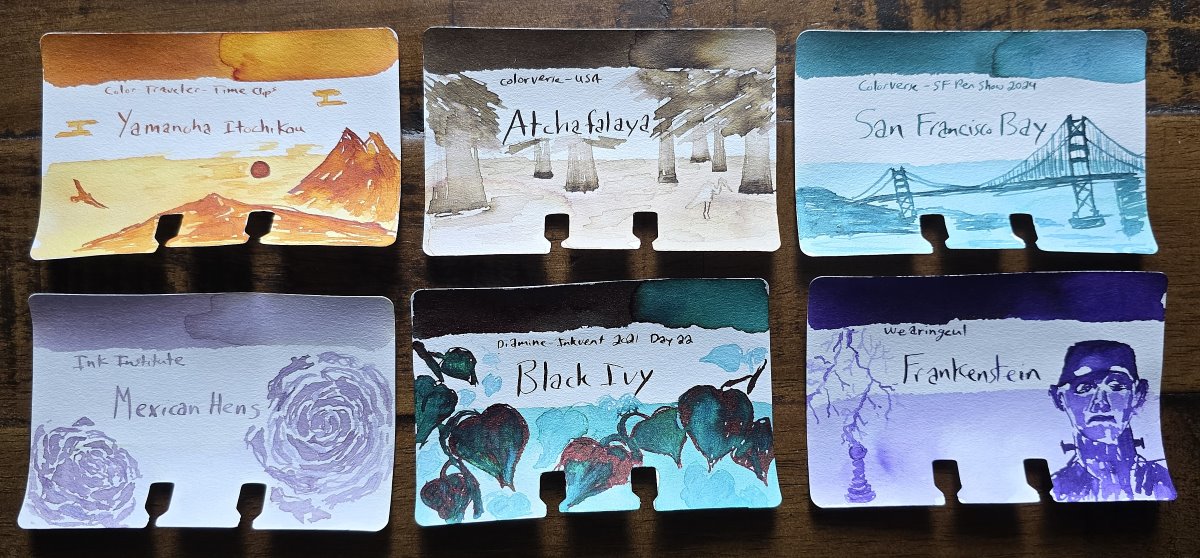
The challenge of trying to represent an ink in monochrome, with limited real estate, continues to be a great exercise for how I want to grow my analog art capabilities and connect with my ever-growing ink collection.
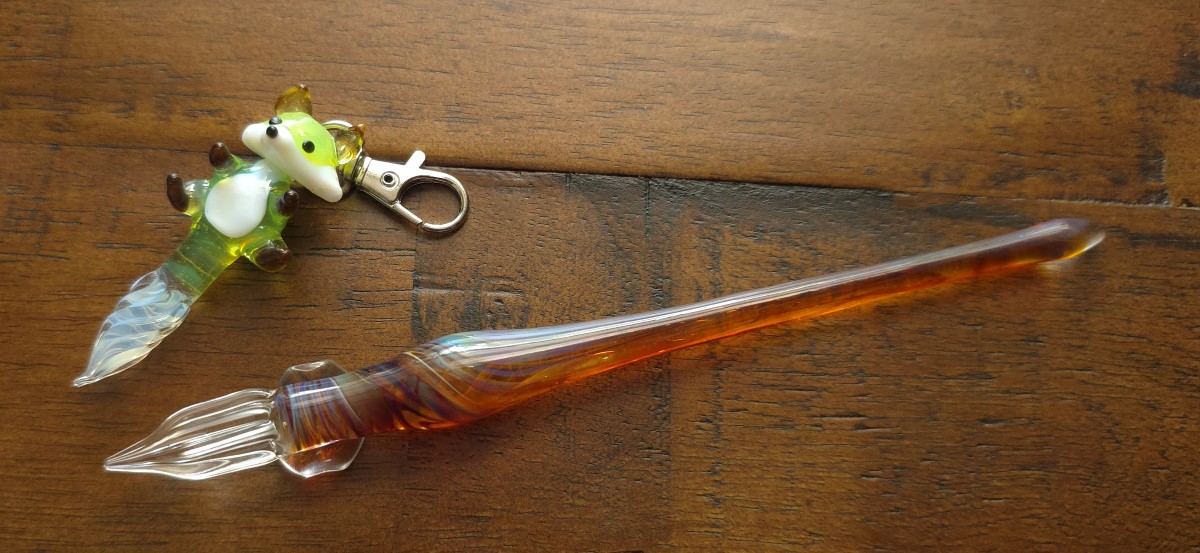
Glass dip pens are by far my favorite tools to use for sketching with ink, with wood pencils being a close second for sketching in general. I rotate through several glass pens which range in price from less than $20 to triple digits.
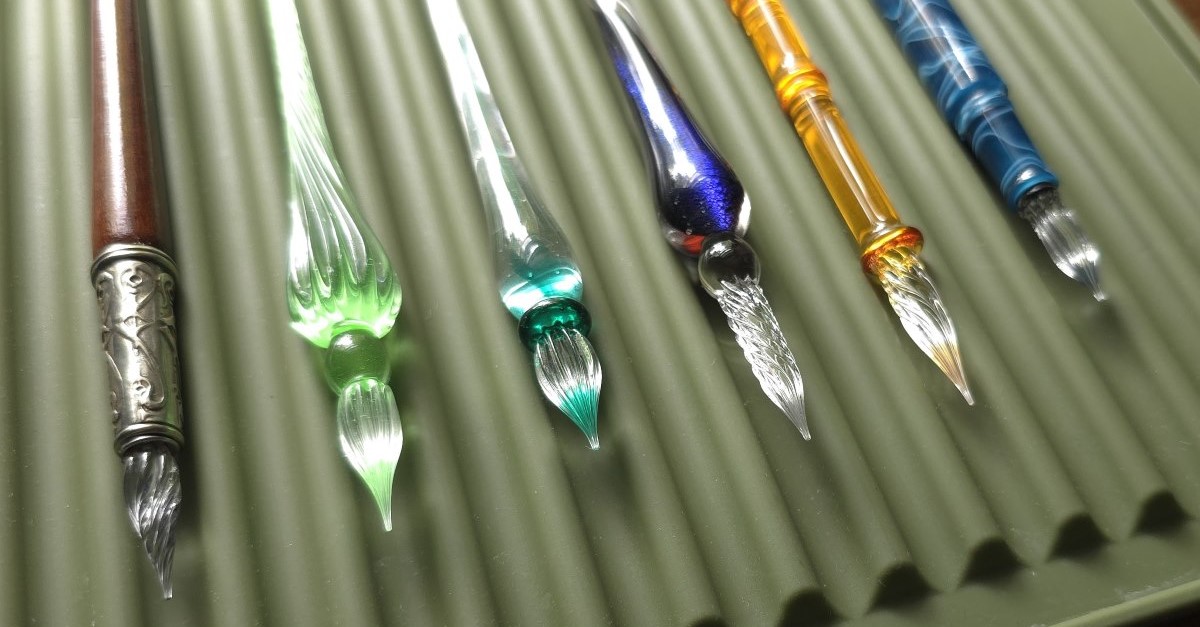
The higher end pens like those I have from artisans in Japan tend to be smoother and more consistent—and genuine works of art. That doesn't mean I don't still regularly use some good pens I've found for less than $30 too.
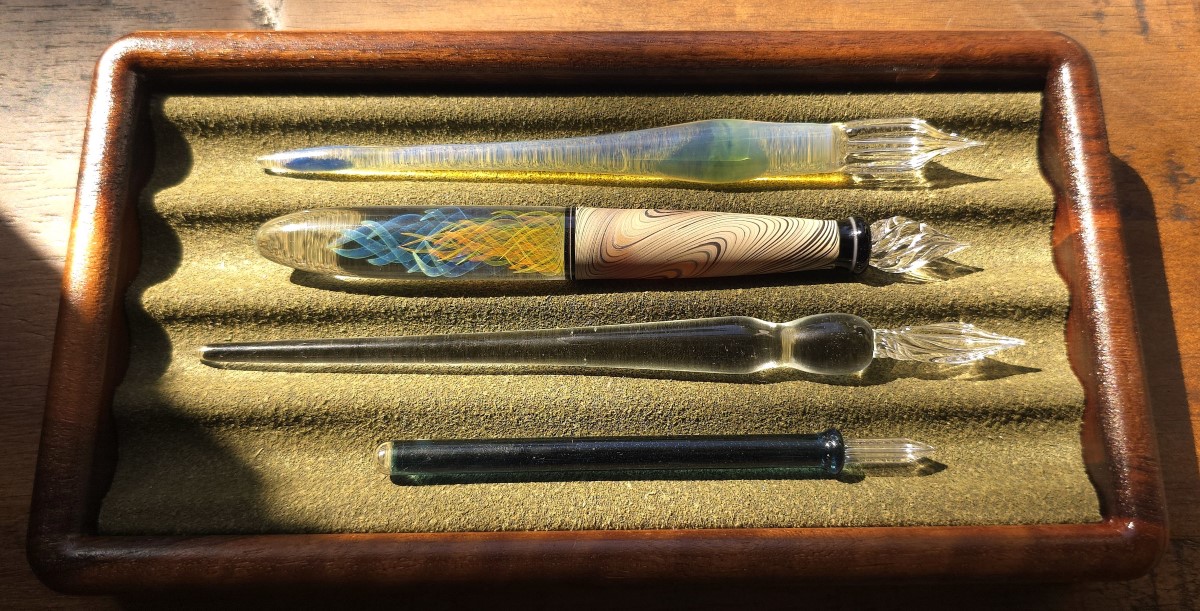
A smooth glass nib can move in any direction and function at a range of angles, I find them to be very expressive tools. As I draw I often change how I hold the pen to produce different lines or fill in larger areas with the side of the nib. The varied nib sizes and shapes lend themselves to different uses.
A technique I've been using is after drawing with an ink for a bit, I'll drip water on the glass nib to dilute the ink remaining in the channels to produce more character and lighter shading in the sketches.
Note: If I've added water to a nib, I always rinse and dry it thoroughly before dipping it back in a bottle of ink.
Continued Exploration
Just because I'm pretty happy with my swatching tools doesn't mean I'm not trying anything new! I've tried glass rods with different diameters including 5mm, 6mm, and 10mm.
I've tried other carving tools with a spoon shape at one end, which tend to work well but have a sharp point on the other end, and I still like the shape of the first carving tool I tried best.
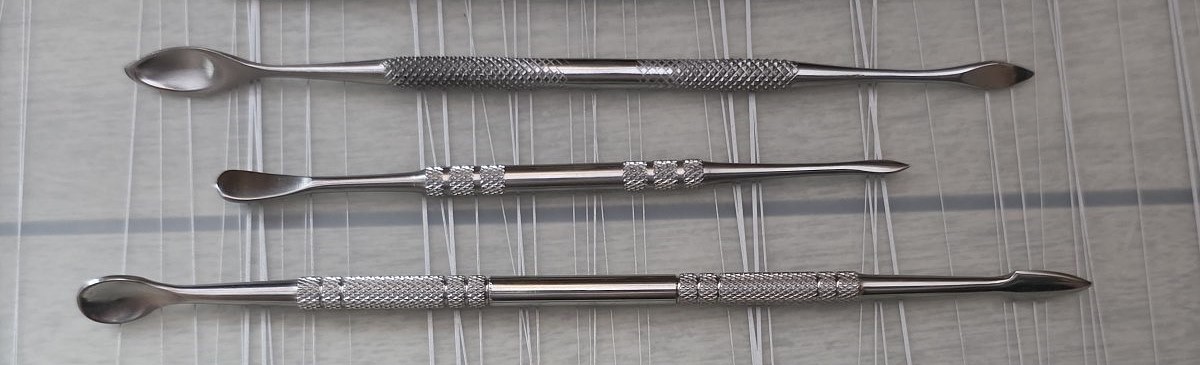
I've tried other kitchen or lab tools made of metal or glass. The metal tools usually work ok but often have rough edges that will scrape the paper so additional smoothing may be required to avoid that. At this point I haven't found another shape of glass tool that works significantly better than a simple stir rod. But, trying any random metal or glass tools you already have is worth a shot, since in my experience anything that can fit into the ink bottle or vial and won't scrape up the paper or swatch card usually works surprisingly well.
Final Thoughts
I think it's pretty clear by now that I love the process of exploring inks through swatching. I find practical value in building up resources I can reference for myself and share with others. I also love the aesthetic value and artistry that can go into showing off ink—I never get tired of seeing ink swatches, from the simple and straightforward to the elaborate works of art.
If you are looking to start or refresh a swatching practice, consider looking at the items around you for a tool that will produce a swatch you like, fits into your ink bottles or vials, and is relatively easy to use and clean. Maybe you already have a slim letter opener on your desk, or a glass dip pen with a smooth handle and rounded end that would be great for swatching.
Also consider the type of nibs and line widths you prefer in pens when choosing a dip nib for labeling your swatches in the same ink, since the closer these match the more you'll be able to preview what an ink might look like in your own pens.
As far as I'm concerned, aesthetics and artistry in swatches are entirely optional, but if that appeals to you—lean in, even if you aren't confident in your skills to do so! Speaking from experience, you might surprise yourself.
Having the "perfect" tools at hand isn't required, consistency and experience with the tools you have is valuable for getting to know your inks better. There are a lot of other details to consider when swatching like what type of card or paper(s) to use, the format and style of the swatch, how to sort and organize swatches, etc., but assembling your swatching tool kit is a good place to start.